Layers
The Layers panel in Maptaskr Power Maps is your central hub for managing all map layers. From this panel, you can add, organise, and interact with layers, giving you full control over how data is displayed and analysed on your map. After adding a layer, a range of options and tools become available to help you filter, visualise, and work with your spatial data.
Adding a Layer to a Map
-
Ensure the layer you want to add has been configured. Open the
Menu.LearnRefer to Config Manager to configure layers for your map controls.
-
Open the Layers panel.
-
Click
Add Layer. -
In the
Layer Gallery, browse the expandable group tree. UseFilter By Groupor the search box to narrow the available layers. -
Select one or more layers or sub-layers to add. Expand a group or layer to find items lower in the hierarchy.
-
Click
Add Selected Layersto add all selected items to the map.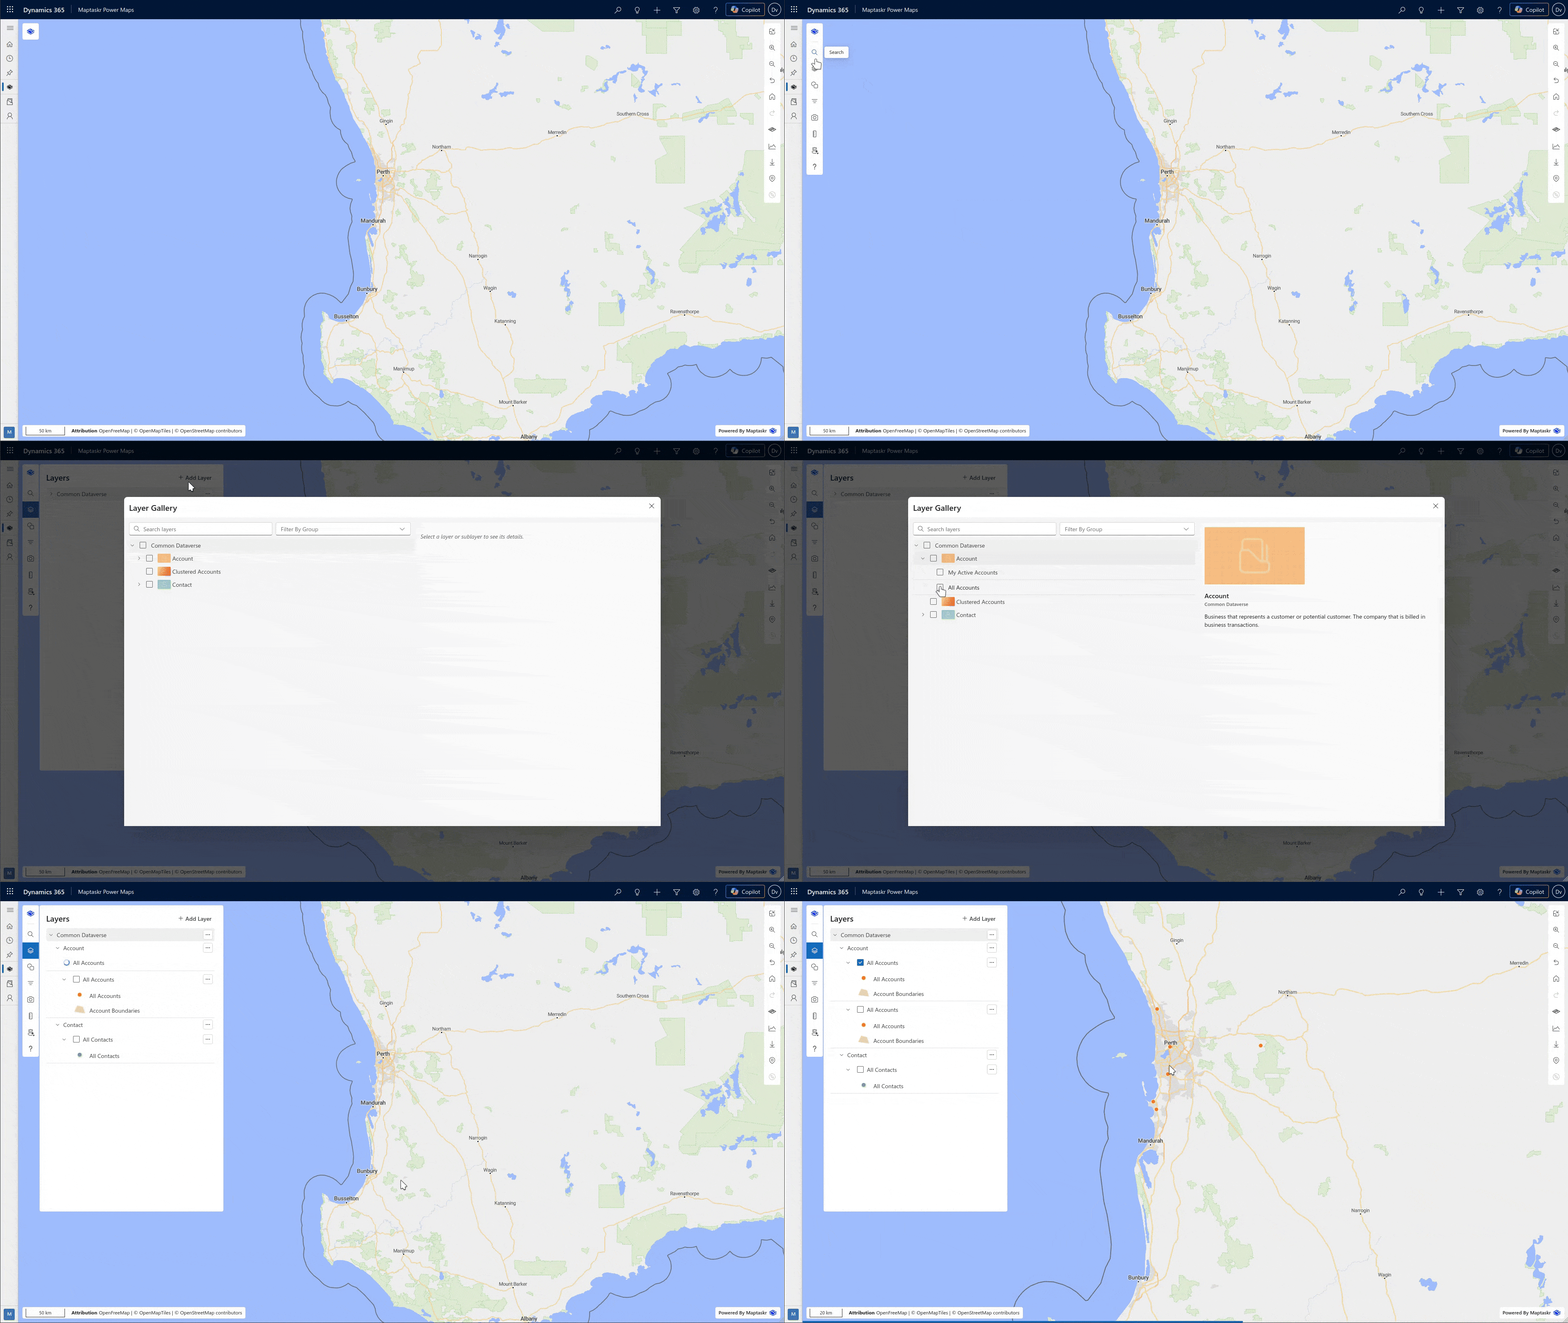
Layer Options and Tools
Once a layer has been added, you have access to the following options:
| Feature | Description |
|---|---|
| Zoom to Extent | Zooms the map to show all points in the layer. |
| Filter Layer | Opens a modal to set field, comparison, and value for filtering. Choose Match All (all criteria) or Match Any (partial match). |
| Opacity | Adjust the opacity of the layer. |
| View Data | Opens a table filtered by your current map view. |
| View All Data | Opens a table with all data related to that layer. |
| Remove | Removes the layer from the map. |
| Refresh Layer | Reloads the layer with the latest data. |
| Bring Backward/Forward | Changes the order of layers on the map. |
| Bring to Back/Front | Moves the layer to the very back or front of the map stack. |