Setup Maps in Apps
Maptaskr Power Maps can be added into any Model-Driven Power App - whether it’s a Dynamics 365 application such as Sales, Field Service, or Customer Service, or a custom app built on the Power Platform. This flexibility lets you visualise geospatial data directly within your business processes.
This page covers three common ways to embed maps:
- Adding a map control to a record form
- Adding a map control as a dashboard
- Adding a map control to a canvas app
For maintainability, add Maptaskr components into a dedicated solution instead of editing the default solution directly.
This makes it easier to migrate or reuse your configuration across development, test, and production environments.
See Microsoft’s guide: Create a solution.
Adding a map control to a record form
The examples below use the Account form for demonstration. In your environment, apply the same process to whichever record form is most relevant for your use.
Adding a map control to a form is best when you want to embed geospatial context against a single record type—for example, showing the location of an Account, Contact, or Work Order directly within its record form. This makes it easy for users to see the geographic context of an individual record while they’re working with it.
-
Go to make.powerapps.com.
-
Open the form where you want to add the map control.
-
Navigate to
Components→More components. -
Check for Maptaskr components:
- If none are listed, click Get more components.
-
Search for
MaptaskrPowerMapPCFand add it to your components list.
-
Select the newly added component.
-
Configure map settings:
Field Description Table Column The column where shapes are stored. Create a new field in your Dynamics table with format “[Table Name] Shapes” (Single line of text). Add this field to any table where the map control is required, and assign the PCF control to it. Profile ID The ID of your selected configuration profile (found top-left). Parameters Used to apply filters to the provider API. Design Width & Height CSS properties to adjust the map’s dimensions. Dynamic Profile IDYou can set the Profile ID dynamically with a small JavaScript expression when configuring the PCF control. This lets different users (or contexts) load different map profiles without duplicating forms. Learn more
-
Hide the field label for a cleaner interface.
- Save and publish your changes.
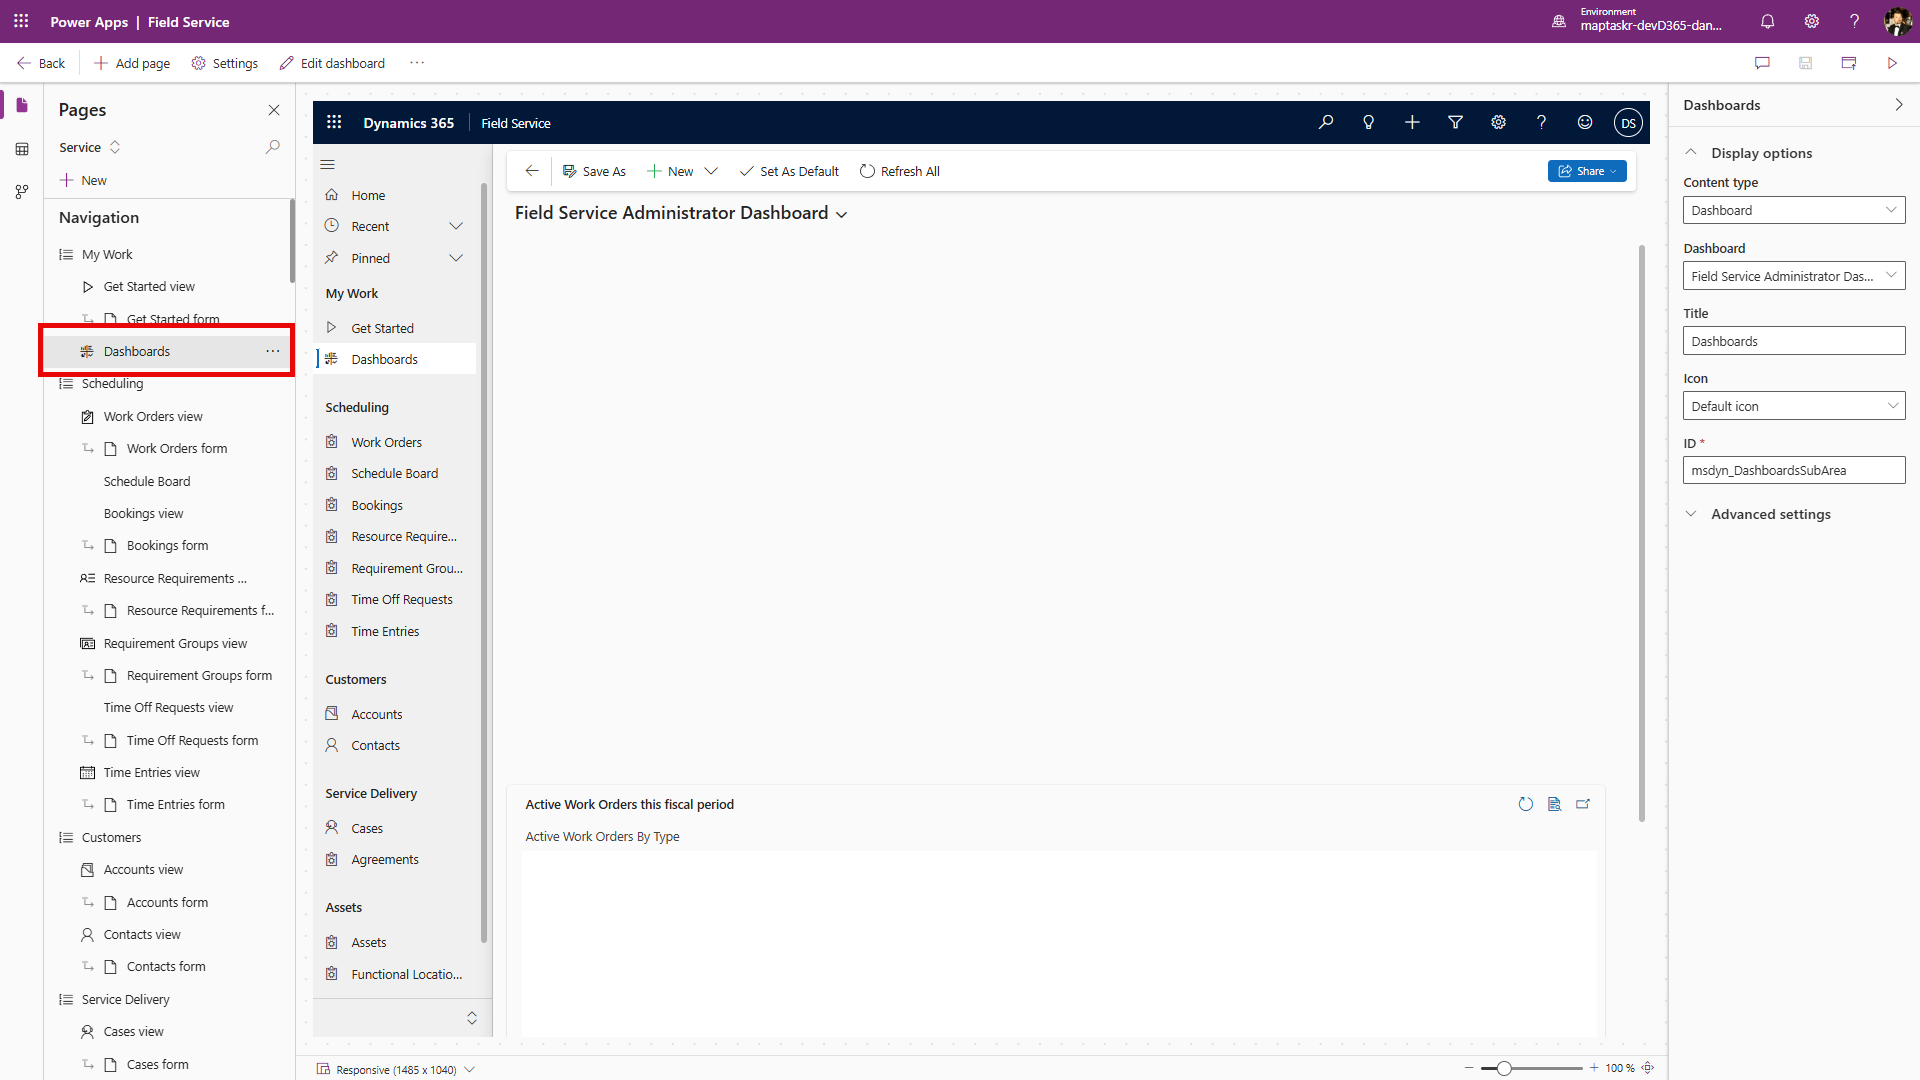
Adding a map control to a dashboard
Best for aggregating and visualising data across multiple records.
-
Go to make.powerapps.com.
-
Open the Dashboard where you want to add the map control by clicking the edit icon.
-
Select List.
-
Choose record type
Maptaskr Core Configs. Use the defaultActive Maptaskr Core Configsview. -
Select
Add. -
Select the newly added component and choose
Edit Component. -
Under
Controls, selectAdd Control. -
Find
MaptaskrPowerGridand select it. -
Select
Add. -
Assign web, phone, and tablet to the new control.
-
Configure map settings:
Field Description Is Control Full Screen Set to true/false. Profile ID Taken from your selected configuration profile. Parameters (optional) Used to filter provider API responses. Design Width & Height Sets the map’s dimensions.
You can set the Profile ID dynamically with a small JavaScript expression when configuring the PCF control. This lets different users (or contexts) load different map profiles without duplicating forms. Learn more
-
Select
Add. -
Save and Close.
-
Save and Publishyour changes.
Adding a map control to a canvas app
The examples below use a Maptaskr Custom App for demonstration. In your environment, apply the same process to whichever canvas app you are configuring.
Canvas apps are the most flexible option. Use this approach when you want to build a lightweight, highly customised app that integrates maps alongside other tailored UI elements.
This is especially useful for mobile-first scenarios or task-specific apps where you control every aspect of the layout.
-
Go to make.powerapps.com.
-
Locate your app (
Appsin the left panel). -
Open it for editing in Power Apps Studio.
-
From the
Insertpanel, select Get more components. -
Select Code and search for
MaptaskrPowerCanvas. -
Import the component.
-
Drag and drop it into your canvas.
-
Select a table for the canvas app.
-
Configure component properties:
Field Description MaptaskrCoreCanvas(Items) Use Maptaskr Core Configs.Views Leave as none. Is Control Full Screen True/false. Profile ID Taken from your selected configuration profile. Parameters Apply provider-specific parameters. Width Control width (if not fullscreen). Height Control height (if not fullscreen). -
Save and publish your changes.
Next Steps
Once your maps are embedded, you can enhance them further by configuring Profiles, Layers, and Providers to control what data is displayed and how it appears.
See: Configuration Overview.