Performance Tips
Overview
This page outlines practical steps to keep Maptaskr Power Maps running smoothly, especially in data‑dense environments or when working with many interactive layers.
GPU Acceleration (Windows 11)
You should make sure your browser and Power Apps (if you use the Microsoft Store desktop app) are both configured to use your high‑performance GPU.
Why it matters
Large vector layers, animation, and frequent re‑renders (e.g. when selecting or filtering) benefit significantly from the discrete GPU (e.g. Nvidia) instead of the integrated GPU.
Configure GPU Preference (Windows 11)
-
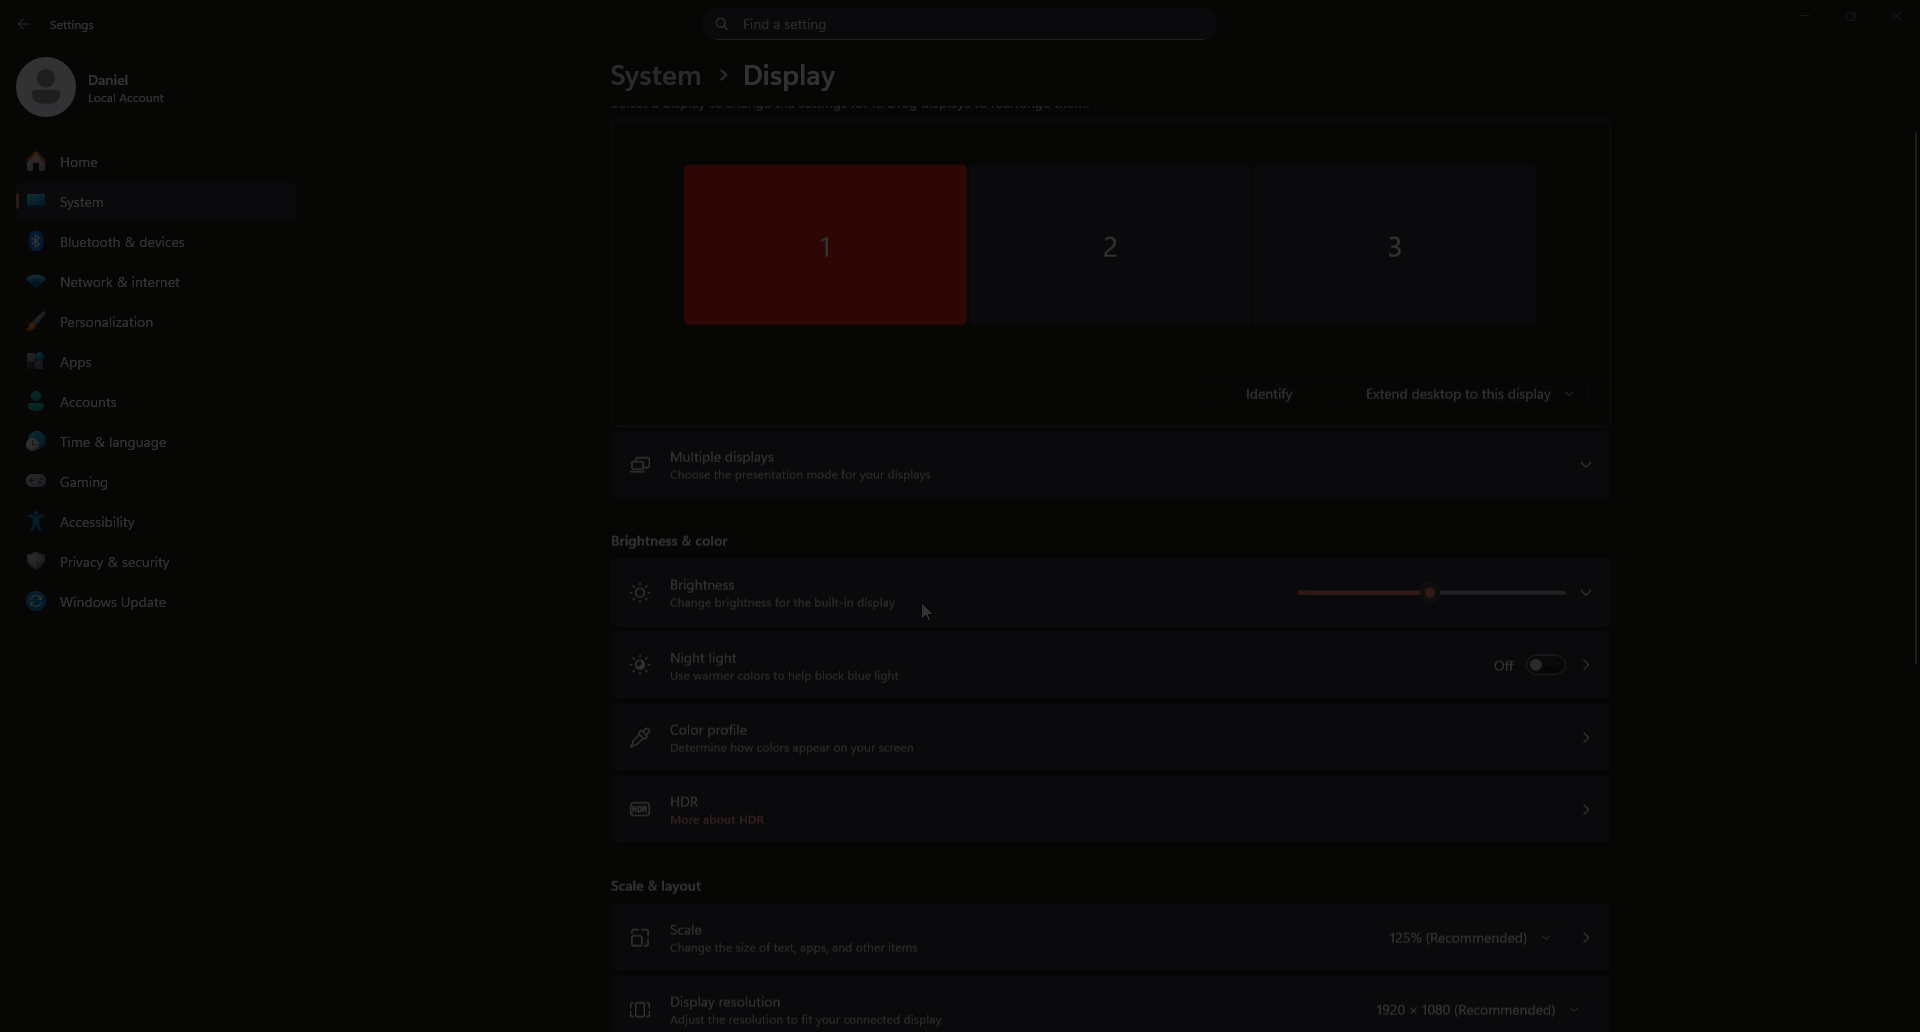
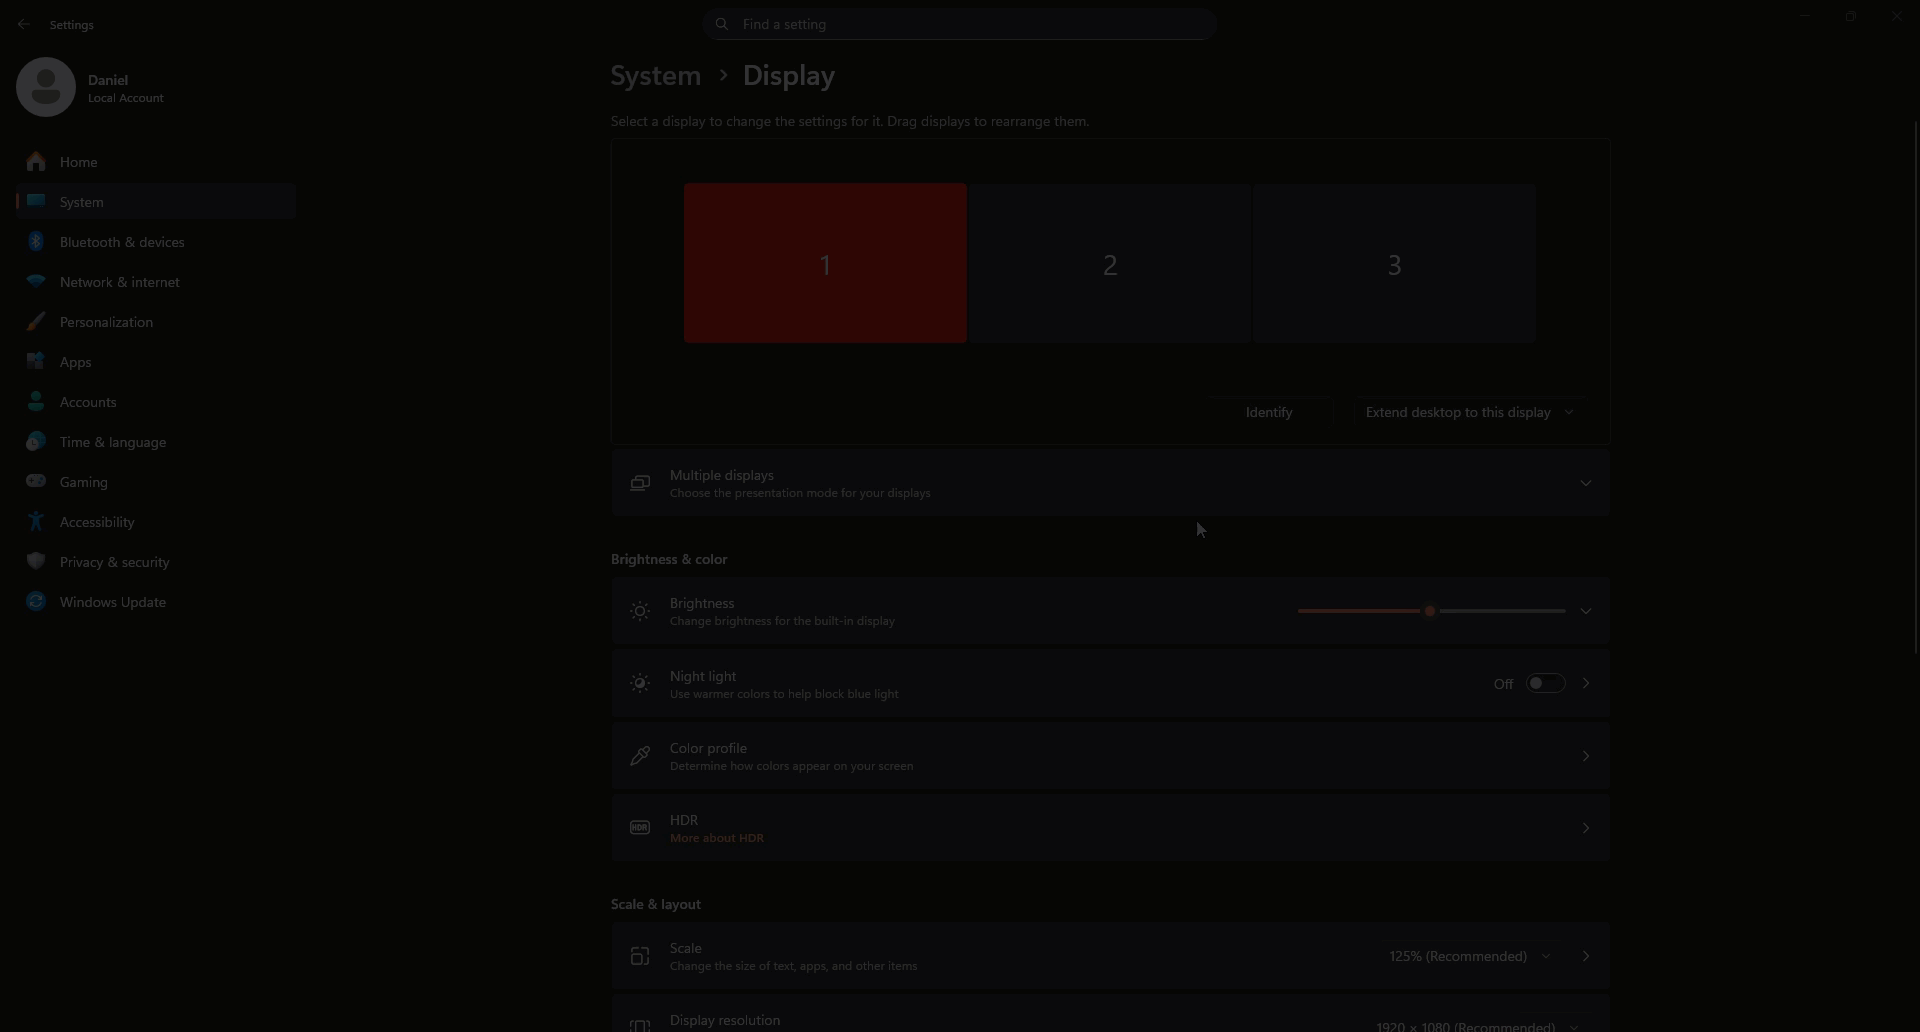
Open Settings → System → Display.
-
Scroll down and click Graphics.
-
In the list, locate each relevant app (e.g. your browser: Edge / Chrome / Firefox, and Power Apps desktop if installed).
-
Select the app → Options → choose High performance (should list your Nvidia GPU) → Save.
-
Repeat for every browser you use with Maptaskr.
-
Restart the app(s) to ensure the change takes effect.
If the app isn’t listed
- Click Browse.
- Navigate to the application executable (e.g.
C:\Program Files\Google\Chrome\Application\chrome.exe). - Add it, then set it to High performance as above.
You can confirm GPU usage via the Windows Task Manager → Performance tab → select the discrete GPU and watch utilisation while interacting with the map.
Layer Performance and Geometry Simplification
What are the layer options for performance adjustment
Every enabled layer exposes a few knobs that directly influence how much data the map must draw per frame. Combining these settings keeps the visualisation responsive without forcing you to drop useful information.
Filtering Fine‑tune which records are retrieved by adding attribute filters (e.g. status, owner, time window). Fewer records mean fewer geometries to draw and smaller payloads over the network.
Maximum features per tile To ensure performance, all tiles feature a default of 1000 feature limit. If a tile hits this limit, remaining features are skipped for this tile. This ensures that dense feature layers do not put excessive load on the GPU or Network as the map attempts to load more features than can reasonably be visible at that scale. You can adjust this value in the layer configuration, but we would suggest only reducing this value if performance is an issue.
Sampling strategy
Sampling controls which records survive when a tile exceeds the maximum. Dataverse layers currently support FirstNFeature. Non‑Dataverse layers add Smattering, which distributes samples evenly across the tile’s extent to avoid clumping around the first fetched rows.
What are the FirstNFeature and Smattering options
| Strategy | Best for | How it works |
|---|---|---|
| FirstNFeature | Sorted business views (e.g. top accounts) | FirstNFeatures will load the first features returned by the layer. |
| Smattering | Spatial overviews, heatmaps, clusters | Buckets the tile into a grid and samples from each bucket to keep coverage. |
Use FirstNFeature when order matters (e.g. “most recent work orders”). Switch to Smattering when you want an even spatial spread (dashboards, quick density checks).
What is Quantization
Quantization is a “lighter geometry” mode. When you toggle it on (for layers that support it) we round each shape to a simple grid before sending it to the browser. The smaller payload keeps older devices responsive, and the only trade-off is a barely noticeable nudge in feature position. Leave it off when you need higher accuracy in the editor—zooming in also automatically increases precision—or flip it on when you just want a quick visual overview.
Efficient use of clustering & heatmaps
Clustering and heatmaps are best used as “big picture” tools: they collapse noisy point clouds into readable density cues. Use them early in a workflow to locate hotspots, then drill into raw points only after narrowing the search.
What does clustering mean?
Clustering groups nearby pins into one symbol that shows the total count. Zooming in or clicking breaks the cluster back into its individual points, so you keep context without drowning in markers. For clusters to display the true count, disable smattering and FirstNFeature on that layer; those sampling modes remove features before the cluster engine tallies them, which improves performance but undercounts the bubble.
How does it compare to smattering?
Smattering thins the dataset before it reaches the map, while clustering keeps every record but changes how it is visualised. If you need to guarantee that all points are still available for drill-through, prefer clustering. If bandwidth or tile limits are the bottleneck, use smattering (or combine both: smattering to cap per-tile load, clustering for readability).
Attribute Pruning
Every attribute you include in a layer will increase memory, and may incur API Costs (Dataverse API Cost link). For the most cost efficient and performant map, you should always reduce the attributes included on a layer to the minimum required to provide for a business goal.
It is far better to have 2 layers pointed at the same data source but used by different business units, with different attributes, than it is to have a single layer with all attributes.
Reduce the attribute load to speed up map performance.�
- Create a Dataverse view (or API query) that exposes only the columns you truly need in the layer legend, popup, or action payloads.
- Avoid wide lookup expansions unless the relationship field is required for filtering.
- Periodically review layer schemas; remove test columns or deprecated KPIs so they do not keep inflating every tile response.