Power Pages Manual Config
Manual configuration is intended for administrators who are comfortable with Power Pages setup, Dataverse security (web roles, site settings, table permissions), and solution lifecycle management.
If you’re new to Power Pages, consider starting with the Power Pages Accelerator in a sandbox, then return to this guide once you’re familiar with the fundamentals.
To integrate Maptaskr Power Maps with an existing Power Pages site, complete these high-level steps:
- Add the PCF map control to the relevant Dataverse (model-driven) form in make.powerapps.com.
- Configure required Site Settings (Web API allow-list) in Portal Management.
- Create required Table Permissions (and link them to a web role) in Portal Management.
- Create a helper Web Template, Page Template, and Web Page (user info endpoint).
- In the Power Pages designer, enable the code component on the form field.
Before You Begin (Quick Checklist)
Before you begin the manual configuration process you must;
- Install and activate the Maptaskr Power Maps solution is in your environment before integrating with an existing Power Pages site. This includes a URL entry added to Supported URLs (include custom domain and
*.powerappsportals.comif applicable, no trailing slash).- See Managing Licenses for more details.
- Have a target Power Pages site provisioned, and know if you’re on the standard or enhanced data model.
- Determine the import approach you wish to use: Standard CSV vs Enhanced (Site Component) imports.
- Confirm who will assign the Web Role to end-user Contacts.
- Ensure the Basic Form / Multistep Form in Power Pages surfaces the exact Dataverse Main Form you’ll edit.
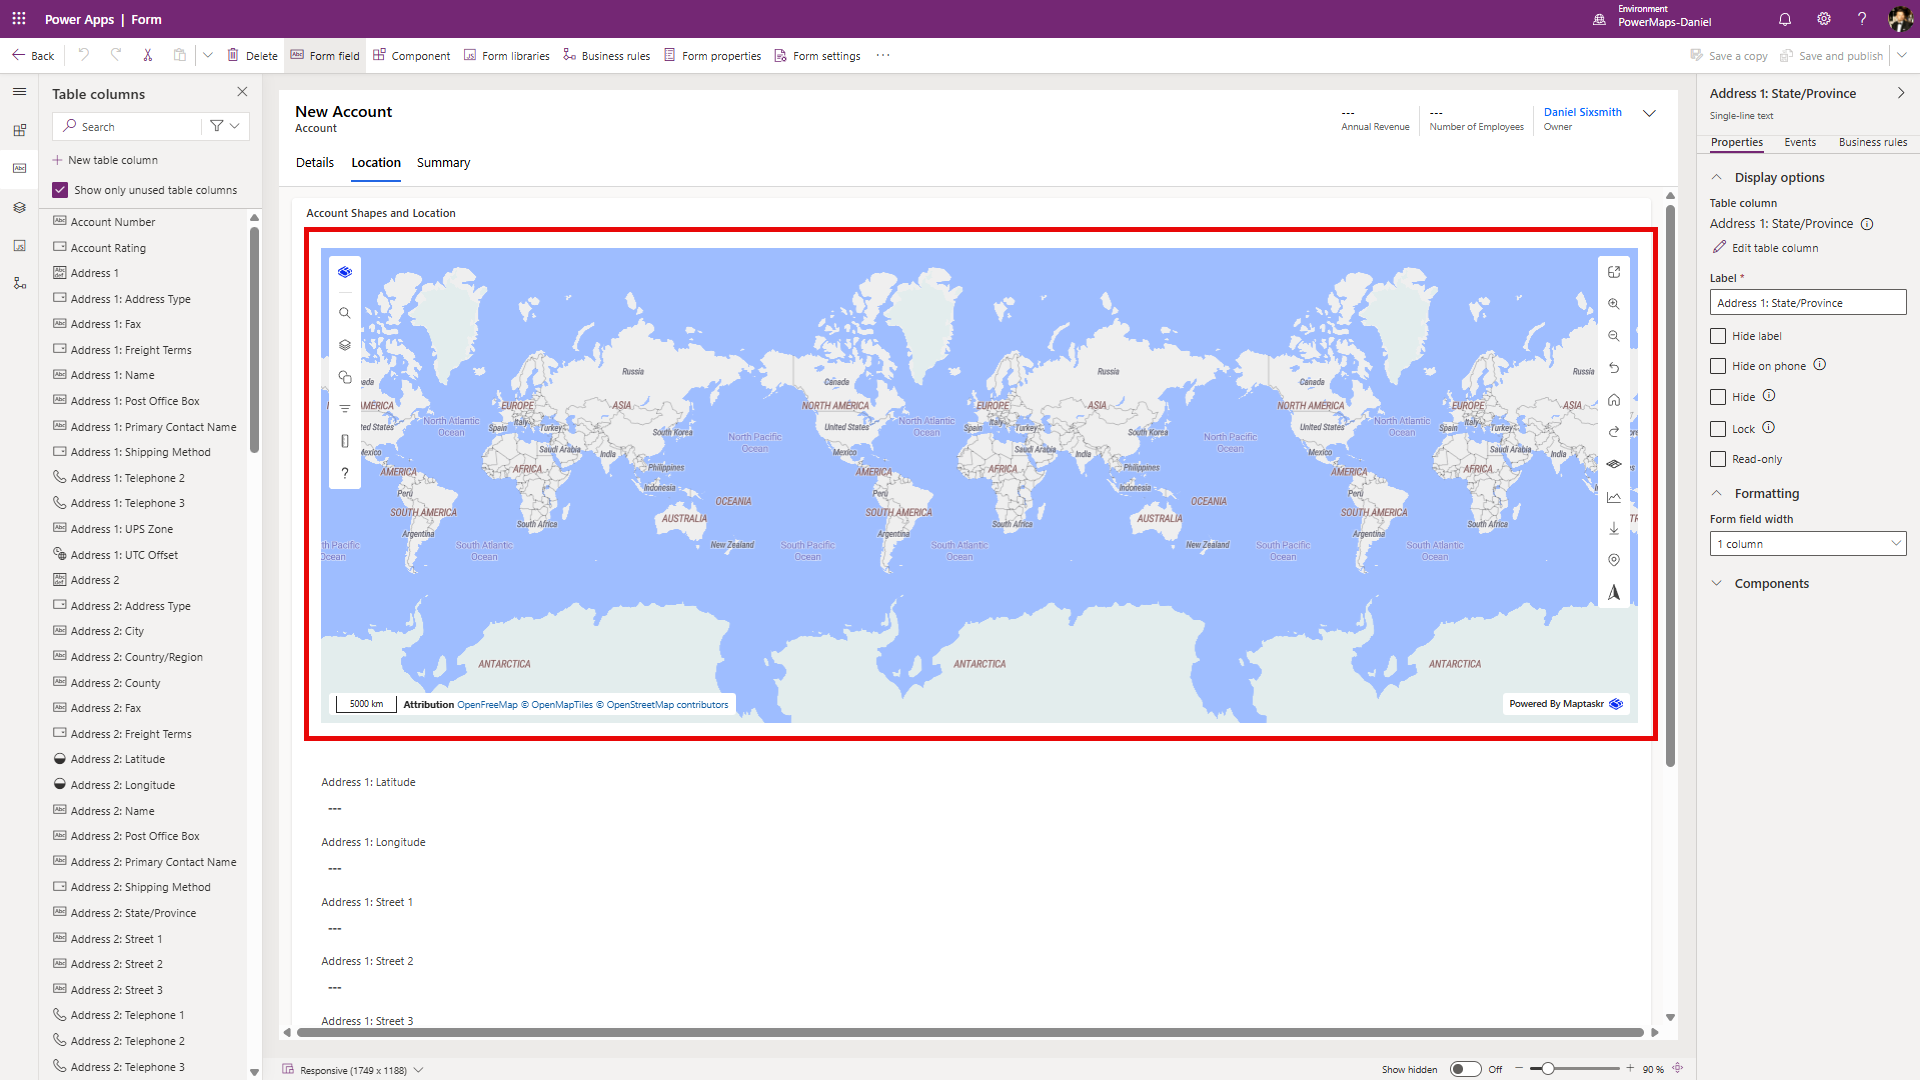
1. Add the PCF Control to a Form
Power Pages Basic Forms and Multistep Forms are generated from Dataverse Main Forms. To surface a map in your portal, you first add the Maptaskr PCF control to the relevant Main Form in Dataverse. This ensures the map is available when that form is exposed through Power Pages.
Make sure you edit the exact Main Form used by your Power Pages form. Adding the control to a different or duplicate form will not surface in the portal.
Steps
-
Open make.powerapps.com and navigate to the solution containing your target table (entity).
-
Open the Main Form you intend to use in Power Pages.
-
Add (or select) the section/tab where the map should appear.
-
Insert the Maptaskr Power Maps PCF control (
Add Control→ search “Maptaskr”). -
In the control properties, configure:
| Field | Description | Value Type / Examples | Mandatory? |
|---|---|---|---|
| Configuration Profile ID | GUID linking the map to a Configuration Profile (providers, layers, styling). Learn more → | 36-char GUID, e.g. 00000000-0000-0000-0000-000000000000 | Yes |
| Design Width & Height | CSS properties that define the rendered size of the map. | Pixels (600px), percentages (100%) | Yes |
| Parameters | Optional filters or query string passed to the provider API. | JSON or key=value pairs | Optional |
| Additional Settings | Deployment-specific options such as default zoom or center point. | Depends on use case | Optional |
-
Save and publish the form.
-
(Optional) Hide the bound field label for a cleaner UI.
Retrieve the Configuration Profile ID
The Configuration Profile ID binds your form’s map to the correct provider, layers, and styling.
-
Open the Maptaskr Configuration area (Configuration → Profiles).
-
Copy the Profile record’s GUID from the form or URL.
Format reminder: 00000000-0000-0000-0000-000000000000 (36 characters with hyphens).
Do not include braces {} or the entire URL.
Learn more about Configuration Profiles →
Not Using a Form?
Just like in the Solution Accelerator, you can embed the Maptaskr map control on a Power Pages page without binding it to a Dataverse form. Use this when you want a standalone, interactive map (pan, search, toggle layers, draw shapes) where user interaction does not immediately create or update a record.
You can implement a standalone map in two main ways:
- Portal Management (Web Template / Page Content) – Maximum control and reusability. Define a Web Template that outputs the container and any Liquid variables, then reference it via a Page Template.
- Power Pages Designer (Edit in VS Code) – Faster iterative changes directly in page content using inline Liquid + HTML.
Use the Web Template route if you expect to reuse the same interactive map shell across several pages. Use Designer editing for a one‑off or when prototyping.
In both approaches you’ll: (a) ensure the required Configuration Profile ID is available and (b) render the PCF control container
- Web Template
- Page Content
- Power Pages Designer
-
Go to make.powerpages.microsoft.com → open Portal (Power Pages) Management and navigate to Web Templates.
-
Create a New Web Template (or open an existing reusable template) and give it a clear name, e.g.
Interactive Map. -
(If new) Set the Website.
-
Paste (or update) the markup below. Replace
PROFILE_GUID_HEREwith the Configuration Profile GUID you copied earlier.
<div class="interactive-map" style="overflow:hidden;">
    {% codecomponent
            name: mtrcore_MaptaskrPowerPCF.MaptaskrPowerPCF
            profileid: 'PROFILE_GUID_HERE'
            designHeightOfMap: 'calc(100vh - 184px)'
            %}
</div>
designHeightOfMap is optional; adjust or remove if you want the height controlled by a surrounding layout. You can also add designWidthOfMap: '100%' if required. Keep the surrounding <div> lightweight—avoid padding that can create scrollbars.
You can swap the static GUID for a Liquid variable if you render different profiles per user role, e.g. {% assign profile = user.roles contains 'Sales Manager' | ternary: 'GUID_A','GUID_B' %} then set profileid: '{{ profile }}'.
- Click Save & Close (or Save if editing). Then reference this Web Template from a Page Template to render the map.
Use this approach when you want a one‑off standalone map and don’t need a reusable Web Template.
-
Open Portal (Power Pages) Management and navigate to Web Pages.
-
Create a new Web Page (or open an existing one) where the map should appear.
-
Ensure the Page Template you are using supports raw content (most standard templates do). If you used the basic “Blank” template, you’re fine.
-
In the Web Page record, locate the localized content table and open the record.
-
In the localized content, locate the Copy (HTML) section.
-
Paste the markup below, replacing
PROFILE_GUID_HEREwith your Configuration Profile GUID.
<div class="interactive-map" style="min-height:600px;overflow:hidden;">
  {% codecomponent
        name: mtrcore_MaptaskrPowerPCF.MaptaskrPowerPCF
        profileid: 'PROFILE_GUID_HERE'
        designHeightOfMap: '600px'
        %}
</div>
- (Optional) For a full‑viewport experience, replace the inline style with:
style="height:calc(100vh - 140px);width:100%;"
Adjust the subtraction value to account for your site header/footer height.
-
Save the Web Page record.
-
Browse to the page URL and confirm the map renders.
If you need a dynamic profile, assign it first:
{% assign profileId = user and user.roles contains 'Sales Manager' | ternary: 'GUID_SALES','GUID_STANDARD' %}
Then:
{% codecomponent name: mtrcore_MaptaskrPowerPCF.MaptaskrPowerPCF profileid: '{{ profileId }}' designHeightOfMap: '600px' %}
Changes to Web Page content may take a short time to appear due to portal caching. If edits do not show, clear browser cache (Ctrl+F5) or restart the portal from the Power Platform Admin Center.
Avoid setting the map container to zero height at smaller breakpoints—ensure mobile users have at least ~400px vertical space or provide a toggle to expand.
Use this option when you prefer the visual Designer for layout, but still want to inject the map directly by editing the underlying page source with Edit in VS Code (browser or local). Ideal for rapid iteration + visual preview.
Prerequisites
- Your site is already provisioned and opens in the Power Pages Design Studio.
- You have the Configuration Profile GUID ready.
- Site Settings & Table Permissions for Maptaskr are in place (Table Permissions and Table Permissions).
Steps (Designer + Inline Source Edit)
-
Go to make.powerpages.microsoft.com and open your target site in the Design Studio.
-
Create (or select) the page where you want the standalone map.
-
Select Edit code the click Open in Visual Studio Code.
-
Insert the snippet below where you want the map rendered. Replace
PROFILE_GUID_HEREwith your Configuration Profile GUID.
<div class="interactive-map" style="min-height:600px;overflow:hidden;" aria-label="Interactive map">
	{% codecomponent
		name: mtrcore_MaptaskrPowerPCF.MaptaskrPowerPCF
		profileid: 'PROFILE_GUID_HERE'
		designHeightOfMap: '600px'
		%}
</div>
- (Optional full viewport) Change the wrapper style to:
style="height:calc(100vh - 140px);width:100%;"
Adjust the subtraction value to account for your header/footer height.
-
Press Ctrl+S (or click Save) in the code editor. Wait for the green confirmation.
-
Return to the Design tab and preview the page. If the map does not appear, hard‑refresh (Ctrl+F5) or open an InPrivate window.
-
Sync the site when satisfied.
Dynamic Profile (Optional)
Add a Liquid assignment above the snippet for role‑based switching:
{% assign profileId = user and user.roles contains 'Field Technician' | ternary: 'GUID_FIELD','GUID_STANDARD' %}
Then reference it:
{% codecomponent name: mtrcore_MaptaskrPowerPCF.MaptaskrPowerPCF profileid: '{{ profileId }}' designHeightOfMap: '600px' %}
Troubleshooting Quick List
- Blank area (no errors): Check Profile GUID spelling and confirm license domain in Supported URLs.
- Scrollbars: Remove extra padding/margins from parent container; ensure only one explicit height rule.
- Map clipped: Parent flex container might have
overflow:hiddenwith constrained height—inspect in DevTools. - Liquid not evaluated: Ensure you edited the correct
*.webpage.copy.htmlfile (not a cached artifact) and saved.
Keep another browser tab open on the live page; after each save in VS Code editor, switch and hard‑refresh to validate changes quickly.
2. Create a Web Role (Web API User)
Power Pages relies on Web Roles to determine what Dataverse data a portal user can access.
To allow Maptaskr maps to query and render data, you need to create a dedicated Web API User role.
If your environment hosts multiple portals, use a clear name such as <SiteName> Web API User to avoid confusion during imports or role assignments.
Steps
- Go to make.powerpages.microsoft.com → Power Pages Management.
- Navigate to Web Roles (under Security).
- Select New to create a new role.
- Populate the following fields:
| Property | Value | Notes |
|---|---|---|
| Name | Web API User | Or use <SiteName> Web API User for multi-site clarity. |
| Website | Your portal’s site | Must match the exact site record. |
| Authenticated Users Role | Yes | Grants access to logged-in users. |
| Anonymous Users Role | No | Prevents this role being applied by default to all visitors. |
- Save & Close.
Assigning the Web Role to Users
After creation, you must link the Web API User role to the contacts (portal users) who need access.
- Open the relevant Contact record in Dataverse.
- Scroll to the Web Roles subgrid.
- Add the Web API User role.
- Save changes.
Assigned users may need to sign out and back in before the new role takes effect in the portal.
3. Configure Site Settings
Maptaskr requires specific Site Settings to allow Web API access to listed tables. This can be done via import (recommended) or via manually.
Import Method
Use this method if you want to avoid manually adding each Site Setting.
Choose one of the two data model options below to quickly import all required Site Settings.
- Standard Data Model
- Enhanced Data Model
-
Open Portal Management for your site (e.g.
https://<environment>.crm.dynamics.com/). -
Navigate to Site Settings (Website section).
-
Download maptaskr-site-settings-standard.csv (contains all required rows).
-
Open the CSV and replace every value in the Website column with your site’s exact name (must match the lookup). Do not change other columns.
-
Save the CSV.
-
In the Site Settings grid command bar select the ellipsis (...) > Import from Excel > Import from CSV.
-
Click Upload, choose the edited CSV, then click Next.
-
Leave the defaults for: Data Delimiter, Field Delimiter, First Row contains column headings, and Allow Duplicates. Click Review Mapping.
-
Confirm that each field maps correctly:
- Name → Name
- Website (Lookup) → Website
- Value → Value
-
Click Finish Review.
-
Click Done to start the import.
-
After the success message appears, refresh Active Site Settings and confirm the new rows are present.
If rows don’t appear immediately, clear the view filters or refresh your browser.
-
Go to make.powerapps.com and open Tables.
-
Change the view to All and locate the Site Component table (this stores Site Settings rows).
-
Download maptaskr-site-settings.csv (contains all required rows).
-
In the CSV, replace every value in the
powerpagesiteidcolumn with your site’s GUID only. Do not edit other columns. -
Save the file.
-
In the table toolbar choose Import > Import data from Excel.
-
Click Upload, select the edited CSV, then click Import (top‑right).
-
When the import succeeds, verify the new rows appear in the Site Component table and under Portal Management > Site Settings.
-
(Optional) Open one imported row to confirm the correct website reference.
Copy the site GUID from the site record URL in Power Pages administration.

Manual Method
Use this method if you prefer to manually add each Site Setting.
-
Open Portal Management for your site (e.g. https://
<environment>.crm.dynamics.com/). -
Go to Site Settings (Website section).
-
Create (or update) entries exactly as listed below. For each logical table add both
/enabled(true) and/fields(*) rows where present.
The asterisk * exposes all attributes for that table through the portal Web API. This is acceptable for initial setup, but for production you should later replace * with a minimal comma‑separated list of required fields to reduce data exposure.
| Table | Website | Source | Value |
|---|---|---|---|
| Webapi/Maptaskr Core License Assignment/enabled | Your Site | Table | true |
| Webapi/annotation/enabled | Your Site | Table | true |
| Webapi/annotation/fields | Your Site | Table | * |
| Webapi/mtrcore_authenticationprofile/enabled | Your Site | Table | true |
| Webapi/mtrcore_authenticationprofile/fields | Your Site | Table | * |
| Webapi/mtrcore_authenticationprofilerequest/enabled | Your Site | Table | true |
| Webapi/mtrcore_authenticationprofilerequest/fields | Your Site | Table | * |
| Webapi/mtrcore_basemaplayer/enabled | Your Site | Table | true |
| Webapi/mtrcore_basemaplayer/fields | Your Site | Table | * |
| Webapi/mtrcore_basemaplayerproperty/enabled | Your Site | Table | true |
| Webapi/mtrcore_basemaplayerproperty/fields | Your Site | Table | * |
| Webapi/mtrcore_config/enabled | Your Site | Table | true |
| Webapi/mtrcore_config/fields | Your Site | Table | * |
| Webapi/mtrcore_configproperty/enabled | Your Site | Table | true |
| Webapi/mtrcore_configproperty/fields | Your Site | Table | * |
| Webapi/mtrcore_layer/enabled | Your Site | Table | true |
| Webapi/mtrcore_layer/fields | Your Site | Table | * |
| Webapi/mtrcore_layergroup/enabled | Your Site | Table | true |
| Webapi/mtrcore_layergroup/fields | Your Site | Table | * |
| Webapi/mtrcore_license/enabled | Your Site | Table | true |
| Webapi/mtrcore_license/fields | Your Site | Table | * |
| Webapi/mtrcore_licenseassignment/enabled | Your Site | Table | true |
| Webapi/mtrcore_licenseassignment/fields | Your Site | Table | * |
| Webapi/mtrcore_licensedurl/enabled | Your Site | Table | true |
| Webapi/mtrcore_licensedurl/fields | Your Site | Table | * |
| Webapi/mtrcore_licenseduser/enabled | Your Site | Table | true |
| Webapi/mtrcore_licenseduser/fields | Your Site | Table | * |
| Webapi/mtrcore_migrationversion/enabled | Your Site | Table | true |
| Webapi/mtrcore_migrationversion/fields | Your Site | Table | * |
| Webapi/mtrcore_offlinecache/enabled | Your Site | Table | true |
| Webapi/mtrcore_offlinecache/fields | Your Site | Table | * |
| Webapi/mtrcore_offlineregion/enabled | Your Site | Table | true |
| Webapi/mtrcore_offlineregion/fields | Your Site | Table | * |
| Webapi/mtrcore_resource/enabled | Your Site | Table | true |
| Webapi/mtrcore_resource/fields | Your Site | Table | * |
| Webapi/mtrcore_serviceprovider/enabled | Your Site | Table | true |
| Webapi/mtrcore_serviceprovider/fields | Your Site | Table | * |
| Webapi/mtrcore_serviceproviderproperty/enabled | Your Site | Table | true |
| Webapi/mtrcore_serviceproviderproperty/fields | Your Site | Table | * |
| Webapi/mtrcore_shape/enabled | Your Site | Table | true |
| Webapi/mtrcore_shape/fields | Your Site | Table | * |
| Webapi/mtrcore_sublayer/enabled | Your Site | Table | true |
| Webapi/mtrcore_sublayer/fields | Your Site | Table | * |
| Webapi/mtrcore_sublayerproperty/enabled | Your Site | Table | true |
| Webapi/mtrcore_sublayerproperty/fields | Your Site | Table | * |
Example new Site Setting record:
4. Create Table Permissions
To use Maptaskr Power Maps in Power Pages, required table permissions must be in place. You can add them via import (recommended) or manually.
When creating table permissions, the ability to add Web Roles is only available after saving the record.
In Table Permissions (Security), create these 22 permissions. Below is an overview of required permissions:
| Name | Table Name | Access Type | Privileges | Web Roles |
|---|---|---|---|---|
| Annotation Permission | annotation | Global | Read, Write, Create, Delete, Append and Append To | Web API User |
| Authentication Profile Permission | mtrcore_authenticationprofile | Global | Read | Web API User |
| Authentication Profile Request Permission | mtrcore_authenticationprofilerequest | Global | Read | Web API User |
| Basemap Layer Permission | mtrcore_basemaplayer | Global | Read | Web API User |
| Basemap Layer Property Permission | mtrcore_basemaplayerproperty | Global | Read | Web API User |
| Config Permission | mtrcore_config | Global | Read | Web API User |
| Config Property Permission | mtrcore_configproperty | Global | Read | Web API User |
| Layer Permission | mtrcore_layer | Global | Read | Web API User |
| Layer Group Permission | mtrcore_layergroup | Global | Read | Web API User |
| License Permission | mtrcore_license | Global | Read | Web API User |
| License Assignment Permission | mtrcore_licenseassignment | Global | Read | Web API User |
| Licensed URL Permission | mtrcore_licensedurl | Global | Read | Web API User |
| Licensed User Permission | mtrcore_licenseduser | Global | Read | Web API User |
| Migration Version Permission | mtrcore_migrationversion | Global | Read | Web API User |
| Offline Cache Permission | mtrcore_offlinecache | Global | Read | Web API User |
| Offline Region Permission | mtrcore_offlineregion | Global | Read | Web API User |
| Resource Permission | mtrcore_resource | Global | Read | Web API User |
| Service Provider Permission | mtrcore_serviceprovider | Global | Read | Web API User |
| Service Provider Property Permission | mtrcore_serviceproviderproperty | Global | Read | Web API User |
| Shape Permission | mtrcore_shape | Global | Read, Write, Create, Delete, Append and Append To | Web API User |
| Sub Layer Permission | mtrcore_sublayer | Global | Read | Web API User |
| Sub Layer Property Permission | mtrcore_sublayerproperty | Global | Read | Web API User |
Only grant Create/Write/Delete on annotation and mtrcore_shape if your scenario requires user‑generated drawings or notes. For read‑only viewer portals you can omit those elevated privileges to reduce risk.
Import Method
Use this method if you want to avoid manually creating each permission.
Choose one of the two data model options below to quickly import all required Table Permissions.
- Standard Data Model
- Enhanced Data Model
-
Open Portal Management for your site (e.g.
https://<environment>.crm.dynamics.com/). -
Navigate to Site Settings (Website section).
-
Download maptaskr-table-permissions-standard.csv (contains all required rows).
-
Open the CSV and replace every value in the Website column with your site’s exact name (must match the lookup). Do not change other columns.
-
Save the CSV.
-
In the Site Settings grid command bar select the ellipsis (...) > Import from Excel > Import from CSV.
-
Click Upload, choose the edited CSV, then click Next.
-
Leave the defaults for: Data Delimiter, Field Delimiter, First Row contains column headings, and Allow Duplicates. Click Review Mapping.
-
Confirm that each field maps correctly:
- Table Name → Table Name
- Name → Name
- Access Type (OptionSet) → Access Type
- Website (Lookup) → Website
For permissions, make sure both options are mapped:
- Append → Append (2 options)
- Append To → Append To (2 options)
- Create → Create (2 options)
- Delete → Delete (2 options)
- Read → Read (2 options)
- Write → Write (2 options)
-
Click Finish Review.
-
Click Done to start the import.
-
After the success message appears, refresh Active table Permissions and confirm the new rows are present.
If rows don’t appear immediately, clear the view filters or refresh your browser.
-
Go to make.powerapps.com and open Tables.
-
Change the view to All and locate the Site Component table (this stores Site Settings rows).
-
Download maptaskr-table-permissions.csv (contains all required rows).
-
In the CSV, replace every value in the
powerpagesiteidcolumn with your site’s GUID only. Do not edit other columns. -
In the CSV, in the content column, find and replace the ID in the variable
adx_entitypermission_webrolewith the GUID of the Web API role you created earlier (Create Web Role). -
Save the file.
-
In the table toolbar choose Import > Import data from Excel.
-
Click Upload, select the edited CSV, then click Import (top‑right).
-
When the import succeeds, verify the new rows appear in the Site Component table and under Portal Management > Table Permissions.
-
(Optional) Open one imported row to confirm the correct website reference & role reference.
If you skip replacing adx_entitypermission_webrole the permissions import but do not attach to the role, resulting in 401 errors on map data calls.
Copy the site GUID from the site record URL in Power Pages administration.

Manual Method
Use this method if you prefer to manually add each permission.
-
Open Portal Management for your site (e.g.
https://<environment>.crm.dynamics.com/). -
Go to Table Permissions (Website section).
-
Select New.
-
Enter a Name.
-
Select a table from the dropdown (refer to the permissions table above).
-
Select your Website.
-
Set Access Type to Global.
-
Set Privileges as per the table above.
-
Select Save.
-
Add the Web API User role to the Web Roles subgrid (see Add a Web Role to a Permission).
Add a Web Role to a Permission
After creation, add each permission to the Web API User role. (Skip this if you used the enhanced data model import and already embedded the role reference.)
-
Select Table Permissions from navigation list on the left
-
Select the table permissions that requires the web role
-
Scroll down to the Web Role table
-
Select Add Existing Web Role
-
Search and select your new Web API User Then Select Add
-
Save the record.
5. Create a Web Template
Create a helper Web Template that returns lightweight user context (used to determine authentication state).
-
Navigate to the
Web Templateslist under the Content section in make.powerpages.microsoft.com. -
Select New and name it Maptaskr User Info.
-
Paste the code below (leave exactly as is).
{% if user %}
{
    "userId": "{{user.Id}}",
    "userName": "{{user.fullname}}",
    "userRoles": [
        {% for role in user.roles%}
        "{{role}}" {% unless forloop.last %}, {% endunless %}
        {% endfor %}
    ]
}
{% else %}
{
    "userId": "Anon",
    "userName": "Anonymous",
    "userRoles": []
}
{% endif %}
- Save & Close
6. Create a Page Template
Create a Page Template referencing the Web Template.
-
Navigate to Page Templates
-
Select New to create a new page template called Maptaskr User Info.
-
Set Website to your Power Pages site.
-
Set the type to Web Template.
-
Select the Web Template Maptaskr User Info.
-
Clear Use Website Header and Footer.
-
Leave remaining fields default and Save & Close.
Ensure Use Website Header and Footer remains unchecked.
7. Create a Web Page
Create a Web Page using the Page Template you just created.
-
Navigate to Web Page.
-
Select New.
-
Set Name to Maptaskr User Info.
-
Set Website to your Power Pages site.
-
Set Parent Page to Home.
-
Set Partial URL to
maptaskr-user-info(no leading slash). -
Choose Page Template Maptaskr User Info.
-
Set Publishing State to Published.
-
Save & Close.
8. Enable the Code Component (Designer)
Final step: enable the code component for the form field in the designer.
-
Open the site in the designer: make.powerpages.microsoft.com.
-
Open (or add) the page hosting the Basic or Multistep form.
-
Select the field bound to the Maptaskr PCF control.
-
Click Enable code component and toggle Enable code component field.
-
Confirm the Configuration Profile ID & optional CSS classes.
-
Click Done.
Maptaskr map not rendering?
Quick checks:
- License Manager: Confirm your site domain (including https:// and no trailing slash) is listed under Supported URLs.
- Configuration Profile ID: Ensure the GUID on the PCF control matches an active profile.
- Site Settings: Verify the relevant Web API
/enabledentries are present and published. - Table Permissions: Confirm the
Web API Userrole is attached and privileges include required Read (and Create/Write for shapes/annotations if used). - Browser Cache: Hard refresh (Ctrl+F5) or open in a private window after changes.
- Portal Cache: Some changes (Site Settings / Table Permissions) may require a portal restart from the Power Platform Admin Center.
- /maptaskr-user-info endpoint: Browse directly; if you see full site chrome instead of JSON, the Page Template did not disable header/footer.
Still failing? Capture console/network errors and contact support with the site URL + timestamp.
Completion Checklist
- PCF control added to Dataverse form.
- Web Role created (Web API User).
- Site Settings created (all listed
/enabled&/fields). - Table Permissions created & linked to the role.
- User Info Web Template, Page Template & Web Page created.
- Code component enabled in designer.
- Basic / Multistep Form using the edited Main Form published.
- Contacts needing access have the Web Role assigned.
- /maptaskr-user-info returns JSON (no HTML wrapper).
Troubleshooting Matrix
Use this matrix to diagnose and resolve common issues when configuring Maptaskr Power Maps in Power Pages.
| Symptom | Likely Cause | Resolution |
|---|---|---|
| Map area is blank, no errors | Wrong Dataverse Main Form or invalid Profile ID | Confirm the correct Main Form is used by the Basic/Multistep form. Verify Profile GUID: 36 characters, hyphenated, no braces. |
| Map loads slowly or inconsistently | Portal cache not refreshed | Restart the portal from the Power Platform Admin Center, or wait 5–10 minutes and refresh browser. |
| JSON endpoint shows full HTML page | Page Template still includes header/footer | Edit the Page Template, uncheck Use Website Header and Footer, republish, and test /maptaskr-user-info. |
| 401 errors on Web API calls | Missing Table Permissions or Web Role not linked | Ensure all 22 Table Permissions exist, are linked to the Web API User role, and that the role is assigned to the correct Contact(s). |
404 error on /maptaskr-user-info | Wrong URL or Page Template misconfiguration | Confirm Partial URL = maptaskr-user-info (no slash). Ensure Page Template references Web Template and header/footer is disabled. |
| Shapes render but layers don’t | Missing Read privilege on mtrcore_layer/layergroup | Add Read permissions in Table Permissions, save, and sync the portal. |
| Annotations fail to save | Insufficient privileges on annotation table | Grant Create/Write/Delete privileges if end-users need to add notes or drawings. |
| Site Settings changes ignored | Portal still serving cached configuration | Restart the portal, republish, and clear browser cache (Ctrl+F5). |
| Empty map area with errors in console | Site domain not registered in License Manager | Add the portal domain (including https://, no trailing slash) under Supported URLs in License Manager. |
| JSON endpoint shows HTML chrome | Header/footer still enabled in Page Template | Update Page Template, uncheck header/footer, republish. |
| Annotations or shapes disappear after refresh | Permissions missing or not persisted | Ensure annotation and mtrcore_shape permissions include Append/Append To and Write. |
| Layers visible, but basemaps missing | Default basemaps not installed or disabled | Verify Core Package install completed. Reinstall if required. |
Security Hardening (Recommendations)
- Maintain a lightweight internal runbook documenting the exact Site Settings, Table Permissions, and Web Roles required by Maptaskr.
- After solution upgrades, validate that new tables and permissions follow the same principle of least privilege.
- Regularly review Dataverse Audit Logs to monitor portal activity and spot unusual access attempts.
Once your portal is live and maps are rendering correctly, it’s important to revisit configuration with a security-first mindset. The steps below help reduce unnecessary data exposure and align your setup with production best practices.
| Area | Hardening Action |
|---|---|
Site Settings fields (*) | Replace wildcard * with a minimal, explicit list of fields required by your maps. This limits data exposure through the portal Web API. |
| Annotation / Shape CRUD | Remove Create/Write/Delete privileges unless end-users must draw or add notes. For read-only portals, keep permissions to Read only. |
| User Info endpoint | Restrict the /maptaskr-user-info Web Page to authenticated roles if anonymous role information is not required. |
| Additional tables (future upgrades) | After upgrading Maptaskr, re-run Site Settings and Table Permissions to ensure new mtrcore_* tables are secured. |
| Role assignment | Periodically audit which Contacts are assigned the Web API User role, and remove unnecessary assignments. |
| Portal cache | After changes, restart your portal and verify effective security using an incognito browser session. |