Layer Gallery
The Layer Gallery in the Maptaskr Power Maps app lets you organize, configure, and manage map layers for your organization. This guide explains how to create layer groups, add new layers (from URLs or Dataverse), and configure their properties and features. By following these steps, you can ensure your map layers are structured, secure, and tailored to your business needs.
Layer Groups
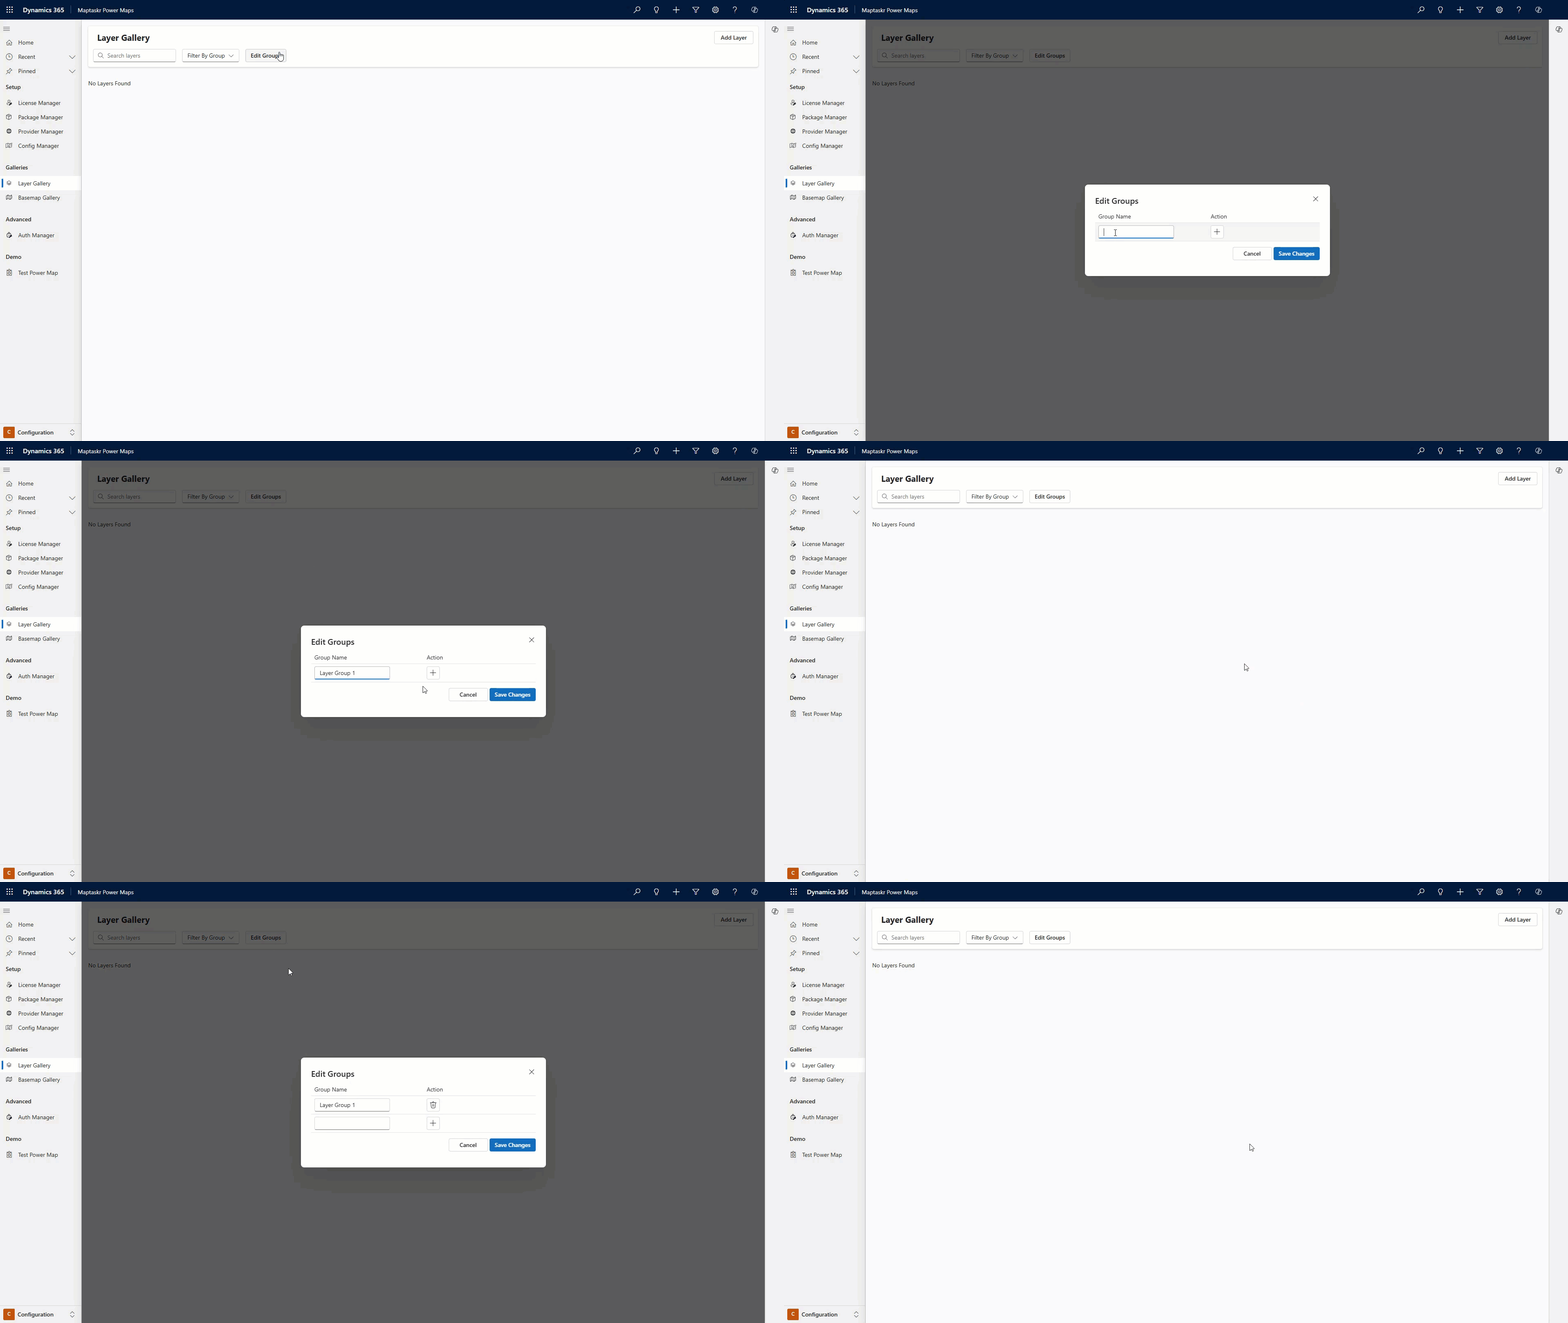
Layer Groups help you organize related map layers. At least one group is required before adding layers.
To create or edit a Layer Group:
-
Open the Maptaskr Power Maps app and navigate to Configuration > Galleries > Layer Gallery.
-
Click Edit Groups in the heading.
-
Type the name of the new group in the text box. You can also update or delete existing groups.
-
Click Save Changes when done.

Adding Layers
You can add layers from a URL or from Dataverse. Each layer must belong to a group.
Adding a URL Layer
-
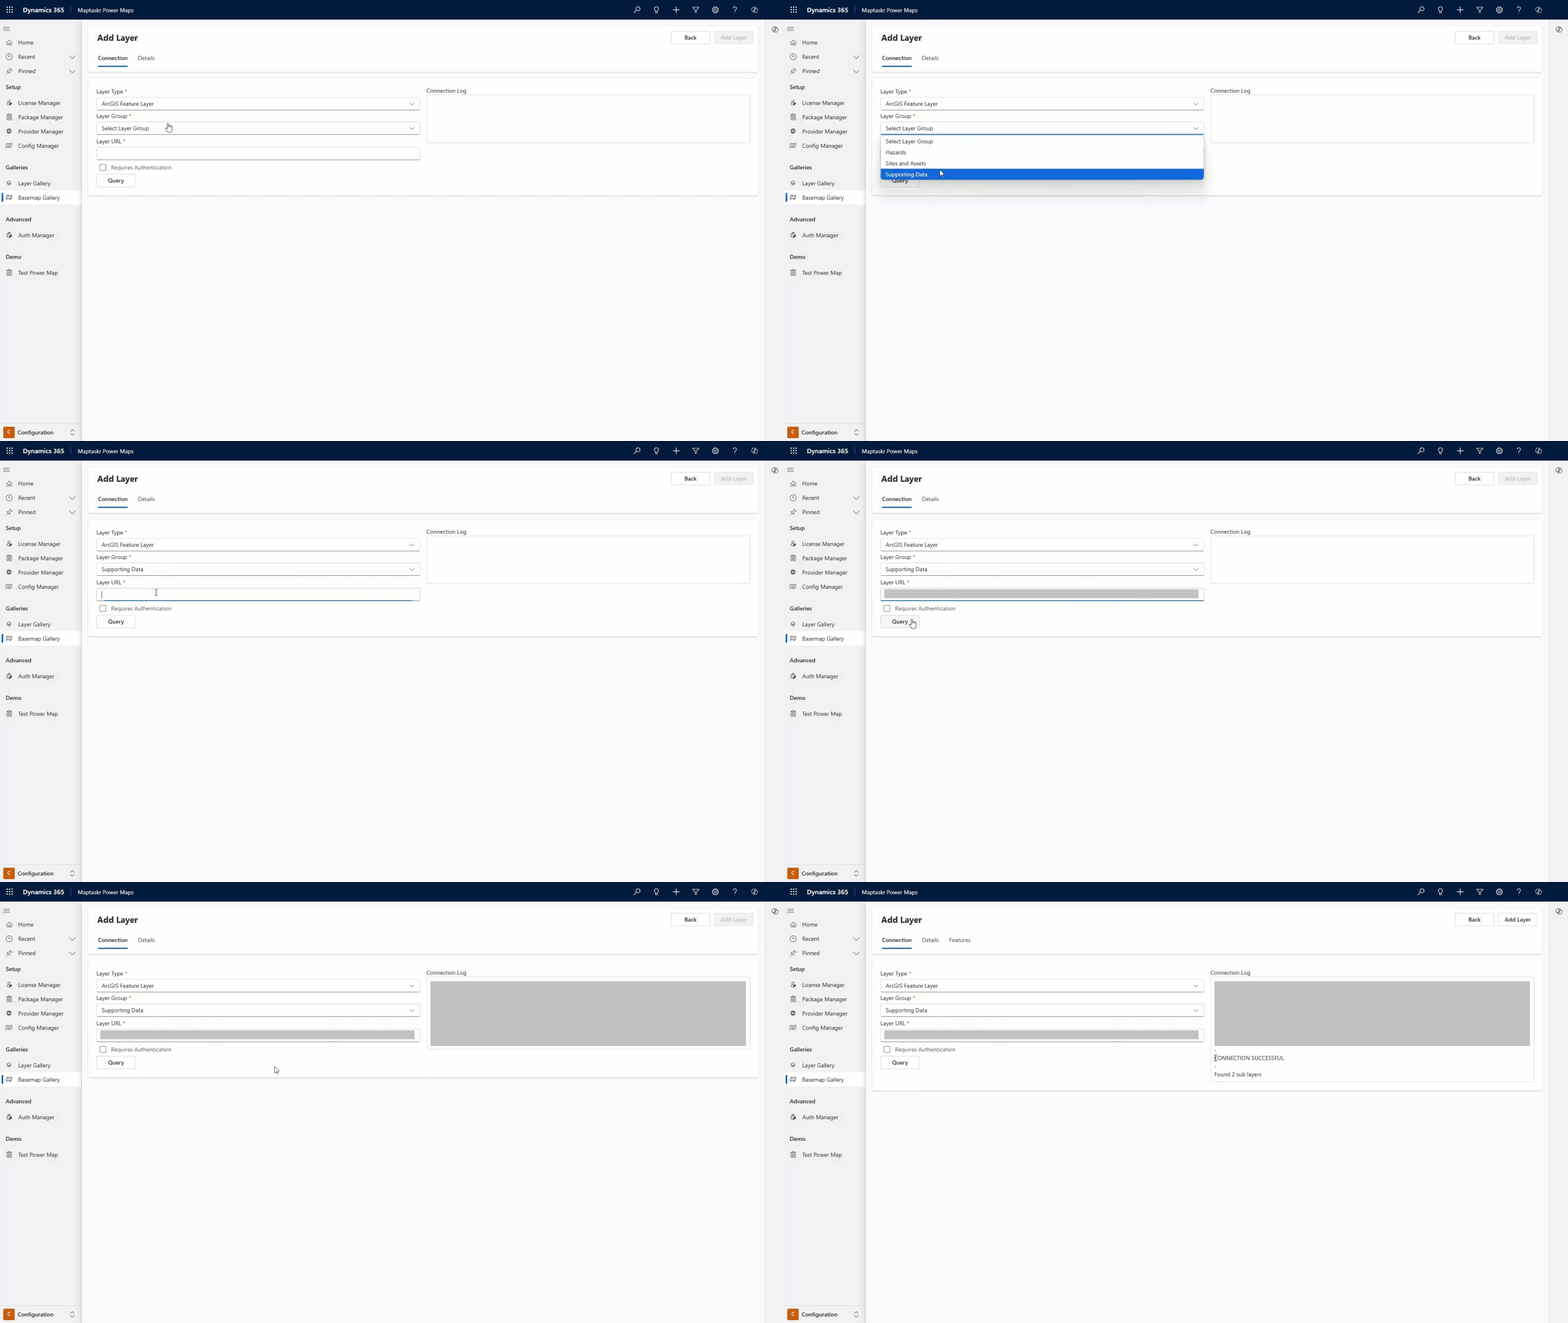
In the Layer Gallery, click Add Layer (top right).
-
Select the Connection tab.
-
Fill in:
- Layer Type (ArcGIS or Azure Maps)
- Layer Group
- Layer URL
- (Optional) Enable authentication if required
-
Click Query to test the connection. If successful, a success message appears.
 info
infoIf this is your first layer, create a group first. Learn more If authentication is required, select an auth profile. Learn more
-
Go to the Details tab and complete:
| Field | Description |
|---|---|
| Layer Title | The title of the layer. |
| Layer Description | Can be predefined by the layer query. |
| Layer Security | Limit access to security groups or teams. |
| Gallery Banner | Thumbnail image for the gallery. |
- Continue to Common Layer Configuration.
Adding a Dataverse Layer
-
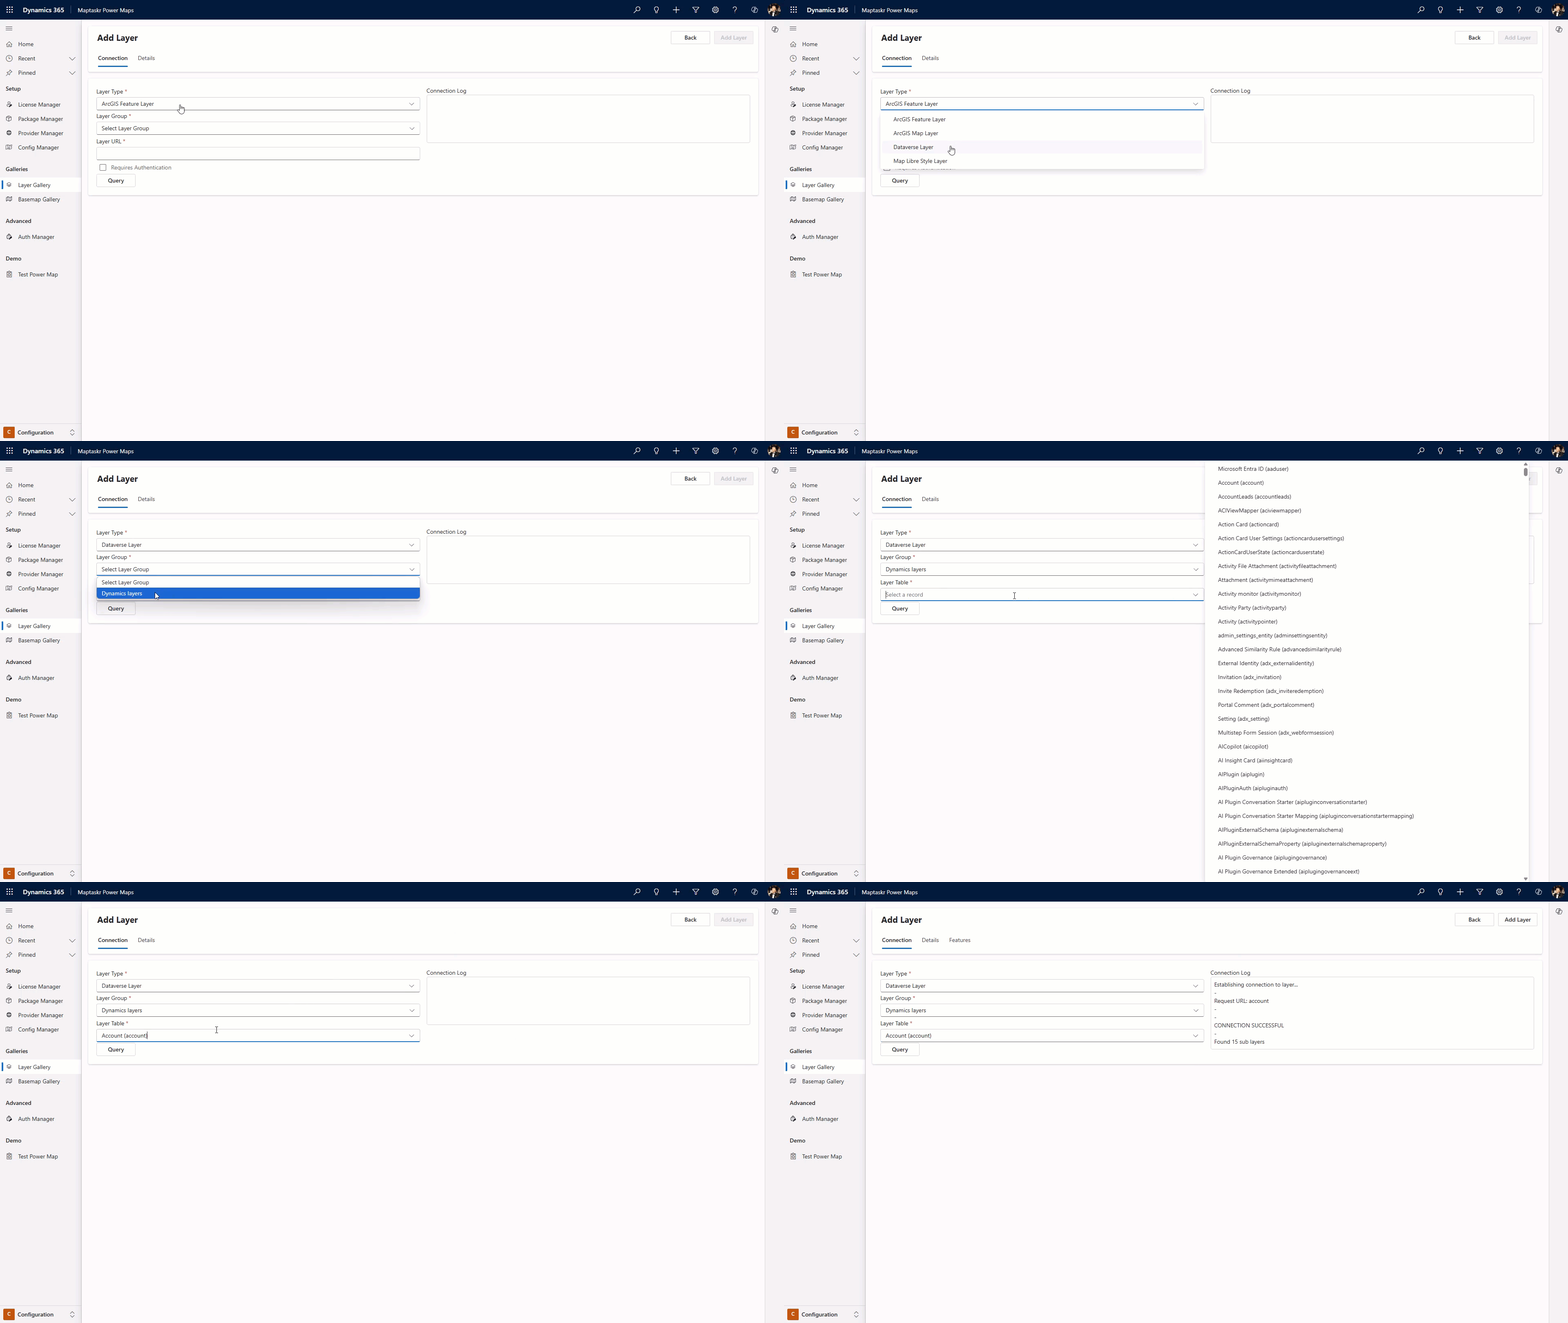
In the Layer Gallery, click Add Layer (top right).
-
Select the Connection tab.
-
Fill in:
- Layer Type (Dataverse layer)
- Layer Group
- Layer Table
-
Click Query to test the connection. If successful, a success message appears.
 info
infoIf this is your first layer, create a group first. Learn more
-
Go to the Details tab and complete the fields as above.
-
Continue to Common Layer Configuration.
Common Layer Configuration
After adding a layer, configure its features and properties:
-
Select the Features tab.
-
Review available layers and enable the ones you want. Click a layer name to manage its features. Selecting the root layer applies actions to all sub-layers.
-
Configure the following options:
| Feature | Description |
|---|---|
| Layer Features | Enable quantization, add a description, and manage filtering. Learn more |
| Layer Styles | Customize styles. Enable Always use latest styles to sync with the API. Learn more |
| Layer Attributes | Manage attributes. Enable for Dynamics, set visibility, reorder, and adjust display type. Learn more |
| Layer Actions | Configure actions for events: ExecuteJs, HTTPRequest, OpenD365Modal, SetAttribute, URLNavigate. Learn more |